Lip augmentation sits at a busy crossroads of artistry, anatomy, and safety. When it goes well, a small volume of hyaluronic acid can soften lip lines, add definition, and restore balance to a face. When it goes wrong, the consequences range from bruising and unevenness to rare vascular events that demand swift, skilled management. I have treated thousands of lips, from first timers looking for a subtle lift to seasoned patients seeking correction after an overfilled look. The common thread in reliable results is disciplined process: sterility that does not slip, a methodical consultation, precise lip filler techniques, and conservative dosing with a plan for follow-up. This guide distills best practices from chairside experience and current standards so you can understand how safe, natural lip filler results are achieved and maintained.
What “best practices” looks like in a clinical room
The safest and most predictable lip filler treatment starts before the syringe is uncapped. A well-run room sets the tone for the entire appointment. Surfaces are clear. Instruments and syringes are laid out on a sterile field. Lighting is bright but not harsh. The injector keeps a tidy line of sight to the lips at all times, and nothing non-sterile touches the injection site after the final cleanse. These details are not cosmetic. They lower contamination risk, help the injector track subtle asymmetries, and support calm, unhurried technique.
Sterility begins with hand hygiene and proper personal protective equipment. I wear gloves, mask, and eye protection, and I cleanse with an alcohol-based rub before donning gloves. The lips and the surrounding perioral skin get a thorough degrease with chlorhexidine or alcohol, avoiding the mucosal border. I apply sterile lubricants or sterile saline only if needed for mapping and glide. Once the field is prepped, I do not re-touch phones, pens, or hair. If I must, the gloves come off, hands are re-cleansed, and new gloves go on. It sounds fussy. It is. Infection rates after lip filler are already low, but meticulous sterility and single-use supplies keep them that way.
Consult with purpose: shape, function, and risk
A seasoned consultation focuses less on trends and more on how lips relate to the rest of the face. I start with frontal and profile assessment. At rest, I look for lip show in the upper and lower lips, dental support, incisor display, philtral columns, Cupid’s bow definition, and the vermilion border. In profile, I assess chin projection, nasal base, and how far the lips sit from a vertical facial line. These points guide whether lip filler for volume is the right tool, or whether a lip flip, skin booster, or even orthodontic referral would deliver a better outcome.
A few questions shape expectations and safety. How do you heal? Do you bruise easily? Are you on blood thinners, high-dose fish oil, or herbal supplements like ginkgo that increase bruising? Have you had cold sores? If so, we discuss antiviral prophylaxis. Prior lip filler, including any lip filler dissolving with hyaluronidase, matters because residual product and scar tissue can change how new filler behaves. I also walk through lip filler side effects, from common swelling and tenderness to rare vascular occlusion, so patients understand the signals that require follow-up.
Matching lip filler types to goals
Most modern lip fillers use cross-linked hyaluronic acid (HA). The best lip filler for a given lip depends on rheology, not brand hype. I think about G prime (firmness), cohesivity, and flexibility. A firm, cohesive gel can shape and lift the Cupid’s bow and vermilion border without migrating, but it may feel stiff in a very mobile lip. A softer, more flexible gel moves naturally during speech and smiling, ideal for volume and hydration across the body of the lip. Some fillers designed for skin hydration can soften vertical lip lines without adding bulk, a quiet but powerful effect for smokers lines.
For first timers or those seeking a lip filler natural look, 0.5 ml is often a sensible starting volume. It gives the lips a test drive and keeps swelling manageable. A full syringe, 1 ml, suits those with very thin lips or clear volume deficiency, but only when the tissue can accommodate it. I rarely exceed 1 ml in a single appointment. Staged treatments reduce risk and yield smoother lip filler results over time.
Technique choices: needle, cannula, or both
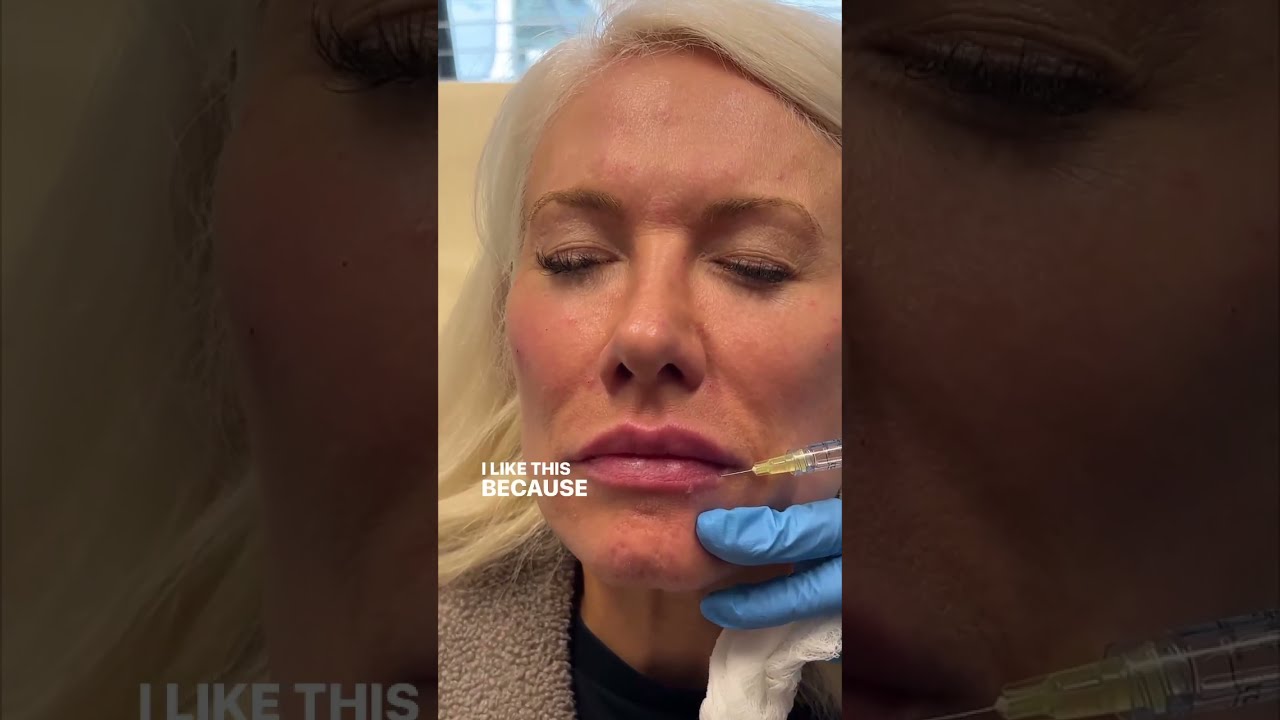
Lip filler techniques are tools, not ideologies. Needles offer precision for the vermilion border and Cupid’s bow. Cannulas lower the chance of piercing vessels and can reduce bruising in the deeper plane, helpful for volume across the body of the lip. I often blend methods. A fine needle can define the white roll and peaks of the Cupid’s bow with micro-aliquots, then a small cannula lays softer filler in the submucosal plane for vertical height and projection.
Depth matters. Superficial placement risks visible lumps and a Tyndall cast, a bluish hue in thin skin. Deep intramuscular placement in the orbicularis oris can stiffen movement and feel unnatural. The sweet spot for most HA lip filler injections is the submucosal or superficial muscular layer, with lighter threading along the vermilion border. Every pass is slow, and every deposit small. I constantly re-check symmetry in neutral expression and with a soft smile. Pressure and gentle massage shape the gel while it remains malleable.
Dosing discipline and the value of restraint
The temptation to chase dramatic results in one sitting is strong, especially when someone brings bold lip filler before and after photos. Natural soft tissue needs time to adapt. Small increments give better control of lip filler effects and fewer complications. If lips are dehydrated or the patient is petite, even 0.4 to 0.6 ml can create visible improvement. I plan a lip filler top up at four to eight weeks to address residual asymmetry, add definition, or refine the philtral columns. That cadence supports lip filler longevity because well-set product integrates better and moves with the tissue rather than against it.
Pain management that doesn’t blur judgment
Numbing creams help, but too much topical anesthetic distorts lip borders and can make precise placement harder. I prefer a thin layer of a low-dose lidocaine-prilocaine cream for ten to fifteen minutes, then a careful cleanse. Many HA fillers include lidocaine, and that intralesional anesthesia builds comfort as treatment proceeds. For sensitive patients, I may add a gentle lip filler treatment in Clarkston dental block, but sparingly, because profound numbness can hide early discomfort that signals intravascular placement. Ice, a calm pace, and clear communication go a long way.
Safety first: vessels, vision, and the occlusion algorithm
Every injector needs a plan for the rare event of a vascular occlusion, especially in the lips where arteries branch densely. A good plan is simple, practiced, and ready at hand. I keep multiple vials of hyaluronidase, warm compresses, 2 percent nitroglycerin paste, aspirin if not contraindicated, and a direct ophthalmology referral protocol. If blanching, disproportionate pain, or livedo reticularis appears, I stop immediately, apply warmth and massage, and flood the area with hyaluronidase, repeating in generous doses until perfusion returns. Proactive steps reduce risk: slow injections, small volumes per pass, frequent aspiration where appropriate, and a deep respect for the superior labial artery near the vermilion border.
Visual symptoms are an emergency. If a patient reports sudden vision changes or severe eye pain during or after lip filler injections, the response is immediate transfer to an emergency department with ophthalmology coverage. No photo, no paperwork, no delay.
The swelling story: what to expect day by day
Most patients worry about lip filler swelling stages more than anything else. Expect a clear arc. Immediate post-treatment swelling can make the lips look larger than planned. Day one and day two often bring the most puffiness. By day three, swelling recedes. Day five to seven is the first honest preview of shape. Residual asymmetry at one week often reflects uneven swelling, not a true contour problem. At two weeks, lips look and feel closer to final, though full integration and water-binding of HA can continue into week three or four. If you want lip filler after one week to look perfect for a big event, you started too late. Build in at least two to three weeks, a month if you can.
Bruising ranges from none to small punctate marks to a deeper purple patch. The upper lip bruises more often than the lower. Arnica may reduce discoloration for some, but time is the main cure. I caution against heavy exercise, steam, and alcohol for the first 24 to 48 hours, which can all increase swelling and bruising.
Aftercare that actually helps
Simplicity works. Keep the lips clean and moisturized with a bland ointment the first day. Avoid makeup over injection sites that same day. Skip kissing and dental appointments for 24 hours to limit pressure and bacterial exposure. Sleep with your head slightly elevated the first night. If you have a history of cold sores, start or continue antiviral medication as directed. Ice in short intervals can reduce swelling and discomfort, but do not press hard. Avoid lip filler massage unless your injector specifically instructs you, as too much manipulation can move the gel or trigger more swelling.
Cost, value, and the myth of “cheap and cheerful”
Lip filler cost varies by region, product, and the injector’s experience. A realistic range per syringe falls around the mid hundreds to just over a thousand in many cities. “Lip filler near me” searches will turn up bargain offers, but price alone is not the right metric. You pay for product quality, the injector’s time and judgment, and the safety infrastructure, from sterile disposables to emergency supplies. A conservative plan that uses 0.5 ml with a follow-up often yields better lip filler results and value than a one-and-done 1 ml at a deep discount. If budget is tight, discuss staged treatment and maintenance rather than seeking the lowest sticker.
When lip filler vs lip flip, Botox, or alternatives makes sense
A lip flip uses neuromodulator to relax the upper lip, allowing more of the pink to evert when you smile. It can help those who show little upper lip at rest but want minimal volume. It does not add structure or hydration, and it can soften the ability to purse, which some dislike. Lip filler vs Botox is not either-or. They often complement each other, with tiny doses of neuromodulator to reduce upper lip curl and filler to build shape.
Alternatives include energy-based collagen stimulation for perioral lines, skin boosters to hydrate without bulk, or topical care for lip barrier health. For some, dental alignment or a small chin enhancement balances the face better than aggressive lip plumping. A good consultation surfaces these trade-offs so you do not chase a trend to fix a structural issue elsewhere.
Natural results, subtle changes, and symmetry
A natural look comes from respecting the existing architecture. If your Cupid’s bow is softly rounded, a sharp “M” peak will look grafted on. If your lower lip already dominates, adding volume there without balancing the upper lip will exaggerate the imbalance. I aim for gentle enhancement along the vermilion border for definition, subtle elevation of the peaks, and measured vertical height, not just forward projection. The ratio between upper and lower lip usually lives comfortably around 1:1.3, but faces vary. Small asymmetries are human. Embracing a whisper of imperfection often looks far more natural than forcing perfect mirror-image symmetry.
Lip filler gone wrong: cause, correction, and recovery
Problems fall into a few buckets. Lumps and irregularities often come from superficial placement or product that does not suit the tissue. Skillful massage in the early days can help, though not all bumps are fixable by rubbing. Hyaluronidase can dissolve HA-based lip filler, either partially to soften a ridge or completely if migration has occurred. Overfilled lips benefit from staged reversal and a two to four week wait before re-filling. True migration above the vermilion border creates a mustache-like shadow. Dissolving and starting over with precise, lower-volume technique solves it more reliably than chasing with more filler.
Delayed inflammatory reactions are rare but real. They can present as swelling or nodules weeks to months later and may follow a viral illness or dental work. Management depends on cause and can include antihistamines, steroids, hyaluronidase, and antibiotics if biofilm is suspected. This is where working with a medical professional who knows the difference between normal settling and a pathological reaction matters.
The maintenance curve: how long lip filler lasts
HA lip filler duration varies with product, metabolism, and movement. In lips, where motion is constant, many see visible changes for 6 to 9 months, with some products holding subtle benefits up to a year. Lighter gels used for hydration may fade faster, three to six months, while firmer gels that focus on structure may last longer but can feel less forgiving. A lip filler touch up at six to nine months maintains shape without redoing the entire build. Hydration, sun care, and avoiding smoking all support lip filler longevity by protecting the surrounding tissue.
Expectations, timelines, and the real “before and after”
Social media compresses the lip filler process into dramatic same-day pictures. Those “after” images often show peak swelling, not final outcome. A truer lip filler results timeline looks like this: day zero, plumper with swelling; day three, peak or resolving; day seven, near baseline with improved shape; week two to three, settled and integrated. A proper lip filler before and after photo pair comes at two to four weeks, in the same lighting and expression. If a clinic showcases only day-one after photos, you are not getting the full story.
Technique notes for specific goals
Subtle look: fewer entry points, soft gel, micro-aliquots threaded parallel to the vermilion border with minimal projection. Focus on hydration and border definition.
Dramatic results: structured gel at the Cupid’s bow and columns, plus controlled volume in the body. Stage the process. Resist the urge to max out the first session.
For symmetry: correct structural deficits first. If the left upper lateral is thinner, start there, then blend across the lip to avoid a patchwork.
For lip lines: treat the cutaneous lip with fine, superficial HA designed for lines, not standard lip gels. Address smoking and repetitive pursing.
For Cupid’s bow: tiny, precise inserts to lift each peak without flattening the philtral columns, which frame the bow.
Myths, facts, and what not to do
Here are five useful checkpoints to carry into your lip filler appointment.
- Myth: More product always lasts longer. Fact: Overfilling distorts tissue and can prompt faster breakdown. Smart dosing staged over time gives better longevity. Myth: Massage fixes every bump. Fact: Some irregularities need enzyme dissolving. Blindly kneading day after day can worsen swelling and invite migration. Myth: All lip filler types perform the same. Fact: Gels vary in firmness and flexibility. Matching product to tissue and goal is half the result. What not to do: heavy exercise, saunas, or dental cleanings right after treatment. Give the tissue 24 to 48 hours to settle. Safety fact: HA-based fillers can be reversed. If a problem arises, a trained injector can use hyaluronidase to correct it.
Preparation that lowers risk
Small habits before your lip filler appointment reduce bruising and swelling. Pause nonessential blood-thinning supplements for a week if your medical provider agrees. Limit alcohol for 24 hours. Stay hydrated, and arrive without makeup around the mouth. If you have a history of herpes simplex, take prophylactic antivirals as directed. Bring reference photos of yourself at a younger age rather than celebrity images. Your own anatomy tells the best story of what will look right.
Choosing the right injector
Credentials, not followers, should guide your choice. Seek a clinician who is medically trained to handle complications, uses hyaluronic acid fillers that are approved in your country, and keeps hyaluronidase on hand. Ask how they approach lip filler consultation, whether they favor 0.5 ml starts in beginners, and how they manage lip filler risks. If you search “lip filler near me,” filter for clinics that show healed lip filler reviews, share full-face perspectives, and educate on aftercare and safety rather than just posting dramatic lips. A portfolio with a range of ages, genders, and lip shapes is a better sign than a feed of identical styles.
When less is more: special cases
Very thin lips with tight tissue respond best to gradual expansion over two or three sessions. Adding 1 ml in one sitting often creates stiffness and looks unnatural. Healed cleft lip repairs or scarred lips require careful mapping and sometimes a mix of fillers with different properties, plus longer appointments. For athletes or brass instrument players, I lean toward softer gels and conservative borders to preserve function. People with dry, peeling lips may benefit more from barrier care and water intake before any filler, since hydration determines how HA behaves.
Recovery tips that speed comfort
Cold compresses in ten-minute on, ten-minute off cycles the first day help. A simple petrolatum-based ointment prevents crusting at entry points. If tenderness lingers, acetaminophen is preferable to NSAIDs, which can increase bruising. Sleep slightly elevated the first night. Gentle tooth brushing to avoid tugging the lip corners helps. Most people return to work the same or next day. If you develop increasing pain, patchy white or dusky skin, or new cold sores, contact your injector promptly. Early intervention shifts outcomes.
Longevity, maintenance, and when to take a break
Plan your year. If you like consistently Village of Clarkston, MI lip filler defined lips, a touch up twice yearly often suffices. If you prefer a subtle look, once a year can work. If you have had several rounds and feel the lips are starting to look pillowy at rest, take a break. I sometimes dissolve and rebuild after a long run of maintenance, especially if migration creeps above the vermilion border. A reset clears the canvas and gets you back to crisp definition.
Lip filler vs long-term facial balance
Lips do not live in isolation. As cheeks and temples lose volume with age, lips can look heavier if they are the only area augmented. A patient who brings photos from their twenties often shows fuller midface support back then. Sometimes a small cheek or chin adjustment makes a new lip plan unnecessary or much lighter. Good injectors talk you out of unnecessary volume as often as they talk you into it.
A grounded FAQ from the chair
How painful is it? With light numbing and filler with lidocaine, most describe it as pinchy and pressure-filled, not sharp. Dental blocks are available if needed.
How long does it last? In lips, six to nine months is typical, depending on product and metabolism. Some see effects up to a year.
How much should I get as a beginner? 0.5 ml is enough for definition and subtle volume. You can add more in a top up at four to eight weeks.
Will I bruise? Many do, usually mild to moderate. Plan treatments at least two weeks before important events.
Can it be reversed? Yes, hyaluronic acid fillers can be dissolved with hyaluronidase.
What if I hate the look at day two? Wait. Swelling peaks early. Reassess at two weeks before making decisions, unless you notice signs of vascular compromise.
Is a lip flip better than filler? It is different. A lip flip rolls out the upper lip slightly but does not add structure. Filler builds shape and hydration. They can be combined.
What is the lip filler healing time? Most feel social within 48 hours. By one week, lips look close to final, with full settling by two to three weeks.
The core of dependable lip work
Reliable lip filler outcomes come from three commitments. First, sterility that never slips, from prep to cleanup. Second, anatomical respect, using the right product in the right plane with doses that the tissue welcomes. Third, honest pacing, with a plan for review and refinement instead of a single, maximal session. When those pillars are in place, lip filler benefits look like you on your best day: hydrated, defined, balanced, and expressive. The lips move naturally when you laugh. The border catches light, not attention. And if a touch up is needed, it is a small tweak in a calm room where the process feels as considered as the result.